🤝 Introduction
We are building Rodina Flow in order to bring developers the ability to create advanced synthetization and augmentation pipelines without the hassle of coding. We believe that you should have complete freedom regarding your development process, so we decided to build Rodina Flow for local execution on your own desktop machine, rather than a paid cloud service. This way, you can enjoy the benefits of Rodina Flow for free! See the video showcase below to get the grasp of what Rodina Flow can do for you.
📥 Download
Currently, Rodina Flow is available on MacOS and on Linux. We are working on supporting Windows and we should release that very soon! To begin your journey start with downloading Rodina Flow to your local machine!
🍎 MacOS instructions
We are still very early in development, so we do not have our Apple Developer ID, yet. Because of that, you need to do some additional steps before launching the app.
Try right-clicking on the app and select Open. This should bypass the warning. If this still doesn't work, do the following.
After unpacking the downloaded .zip, open the Terminal app, navigate to the directory containing the unpacked .App package and run the following command.
xattr -d com.apple.quarantine Rodina\ Flow.appNow, you should be able to run Rodina Flow without any issues!
🤔 Concepts
🔗 Node
The most basic node has a single input and a single output. Optionally, a node can have parameters which you can easily set through the provided input fields. All the nodes always operate on images and always preserve transparency. You can think of a node as a single step in your image processing pipeline.
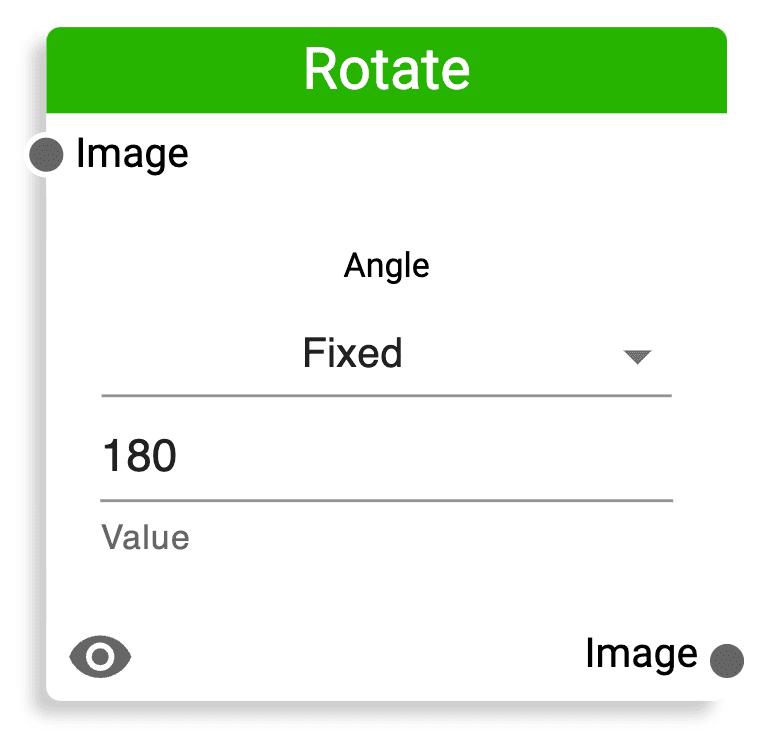
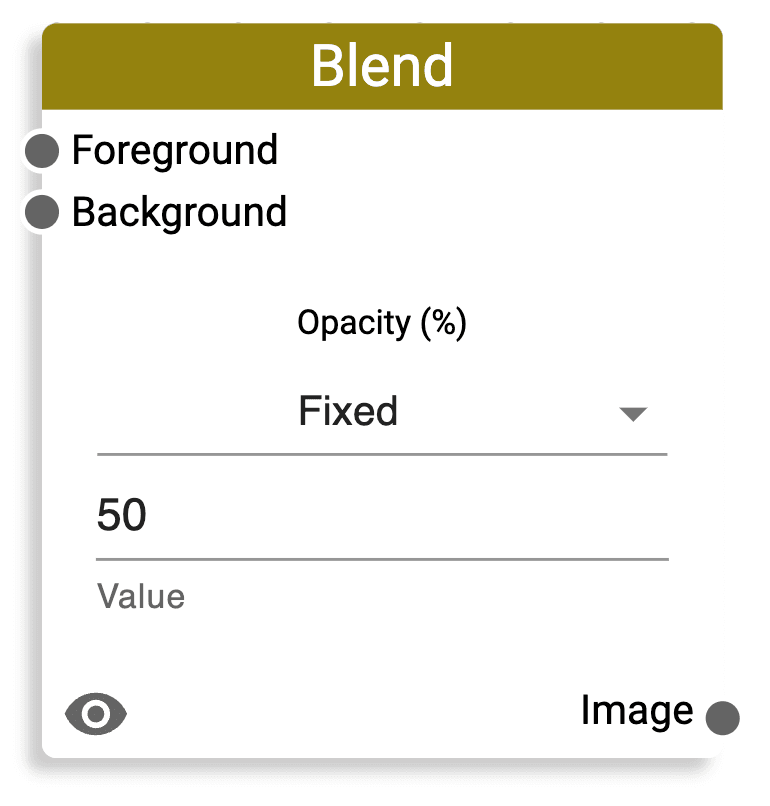
Some nodes can contain multiple inputs or multiple outputs. We strive to build a system that's easy to understand, but in case of any troubles, refer to this documentation for help! On the left navigation bar, you can descriptions of all the avalable nodes grouped into categories the same way as in Rodina Flow.
🎷 Pipeline
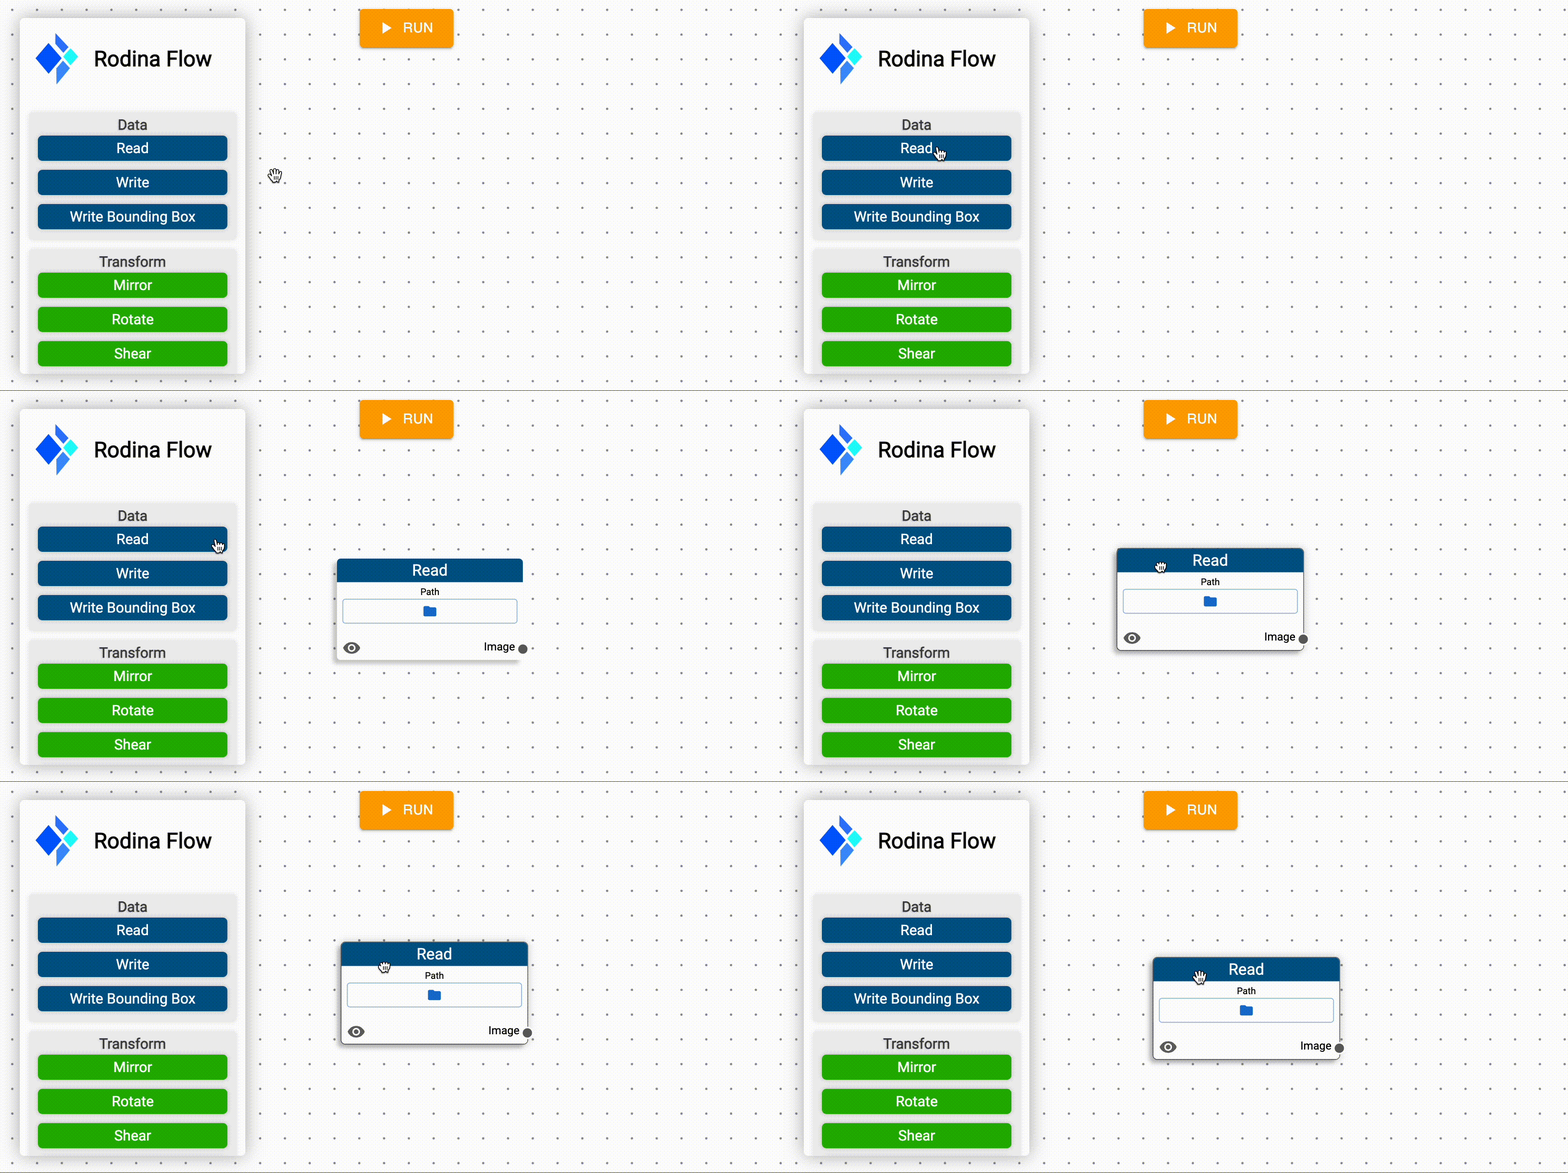
Nodes can be combined together to build infinitely complex and advanced pipelines. Nodes are designed in a way that maximizes flexibility and allows you to build whatever you want. Every self-respecting pipeline always starts with a data read. You can create a new Read Node by simply clicking it on the node menu.
Now, it is possible to apply many different transformations on top of the loaded image. In this example, we decided to create a simple pipeline that rotates an image, extracts its mask and saves the result to the file. During any step of development, it is possible to preview the image at each of the steps.
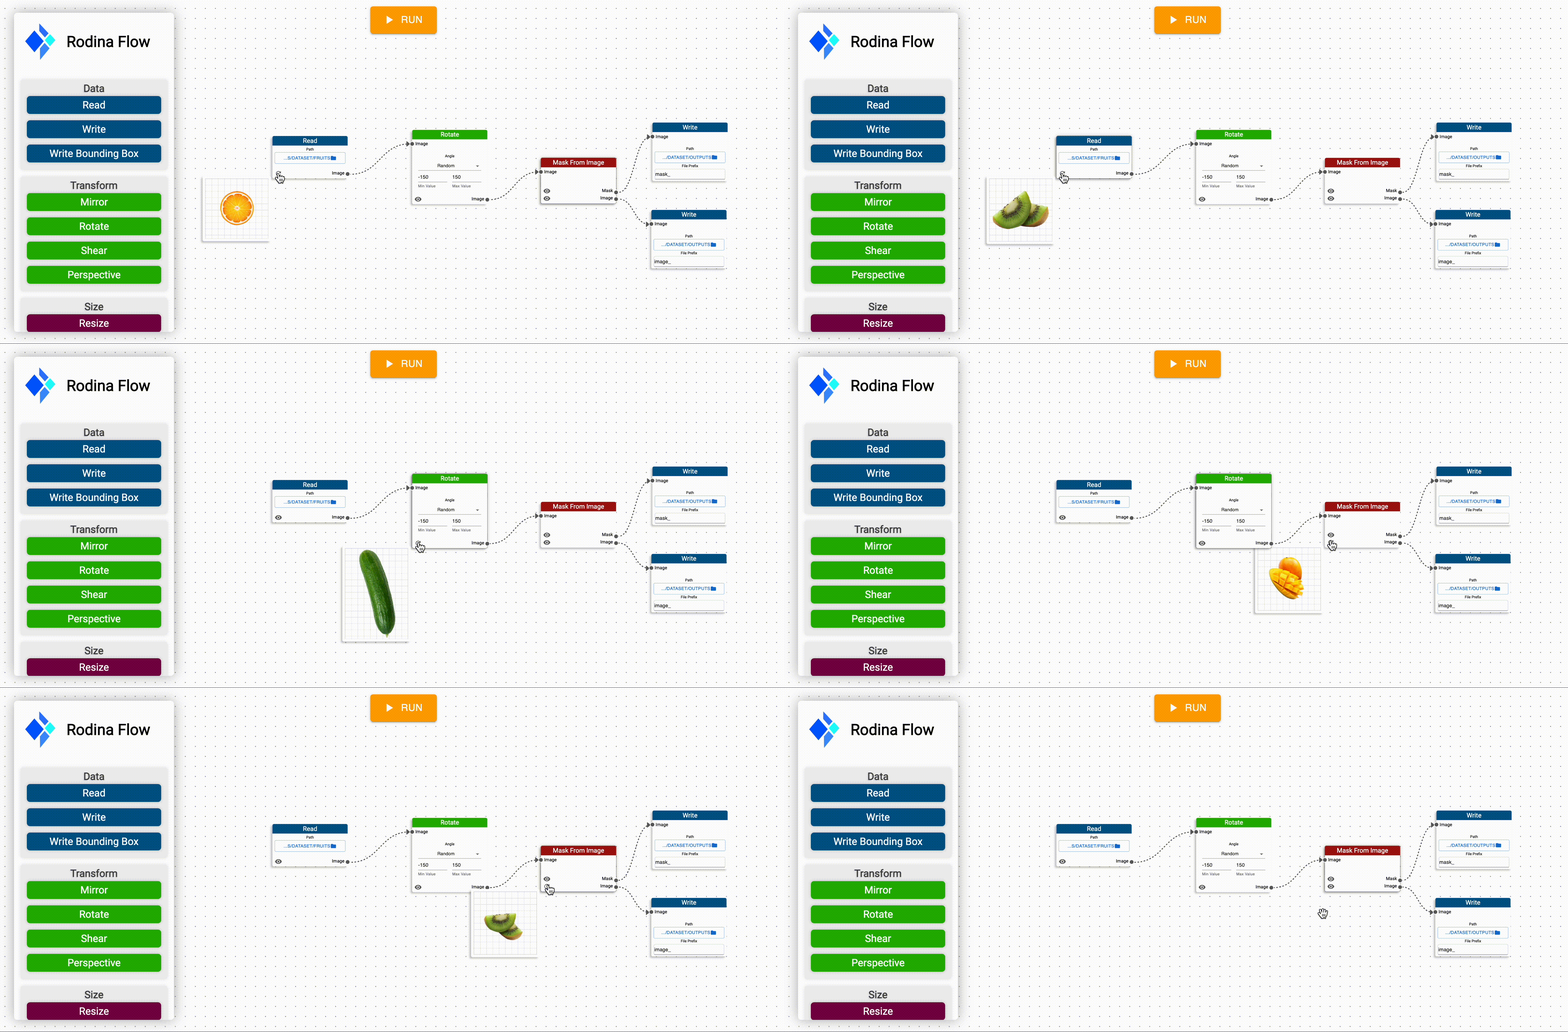
fruits/ directory and processed with the pipeline. Once your pipeline is ready, simply press RUN at the top of the screen to run the processing for all images in the directory you have selected. For our
wonderful dataset contaning 4 images of fruits, this is the result. Don't forget to save it, by selecting File->Save As in the app's menu.
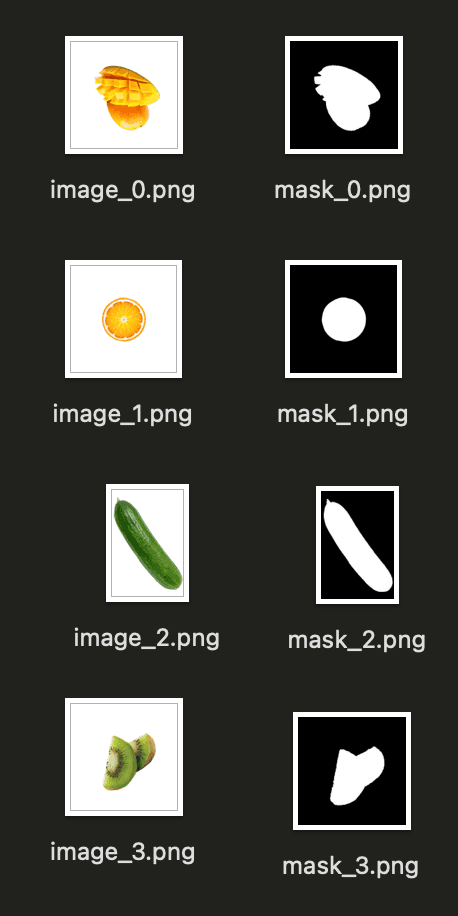
Great! You got the very basics of Rodina Flow! This is enough to build even very complex augmentation pipelines. Make sure to check out the documentation for information on other available nodes.
🗳️ Complex Sampling
What if you want to combine multiple images together? It's possible. Whenever your pipeline has more than one Read Nodes,
it will sample every possible combination of the provided files. Let's come back to the fruits/ datasets. We are going to supplement it with some
nice backgrounds, which are located in the backgrounds/.
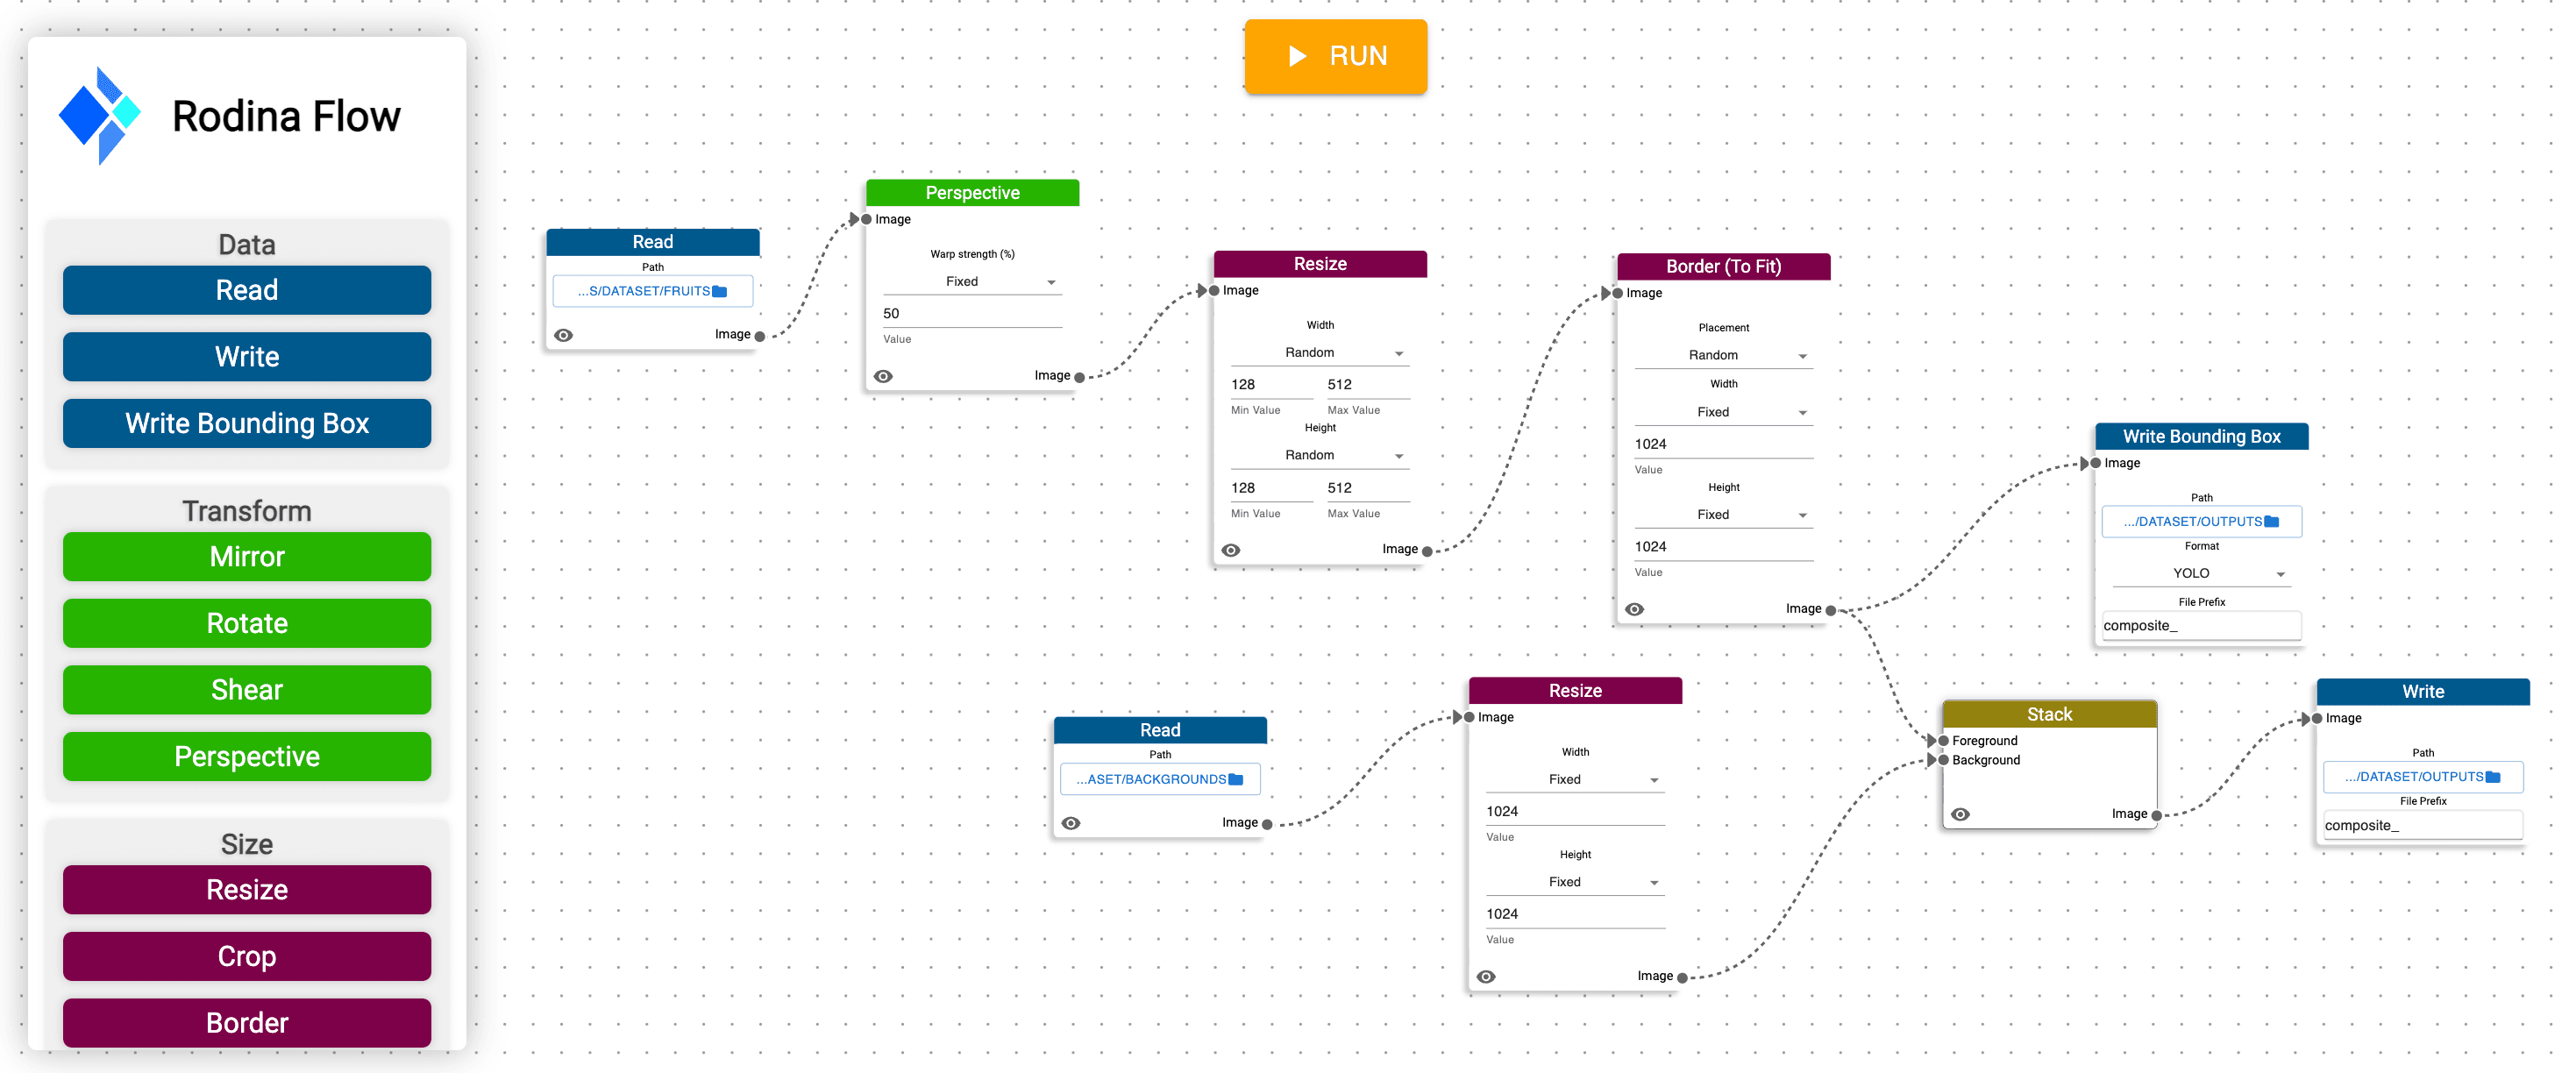
With a total of 4 images of fruits and 3 backgrounds, we end up with a total of 12 samples. Each sample has an annotation in a YOLO format as well as a corresponding image.
// composite_0.txt - one of the generated YOLO annotations
0 0.270020 0.266113 0.133789 0.155273
composite_0.txt - even though the images may not look realistic, models trained on them still perform good.Don't believe us? Check out examples
📚 Further reading
After understanding the basics of Rodina Flow, you should check out some more advanced examples which include data generation for Object Detection or Object Segmentation.